How to Create a REST API in Codeigniter with Basic Authentication
A REST API is a web service which uses HTTP methods likes GET, PUT, POST, DELETE for data manipulation over the cross platforms. We will build a PHP Rest Api Using codeignitor.
Question- What is API?
Answer - API Stands for Application Programming interface (to know more about Click here )
Question - What is REST in REST API?
Answer - REST stands for Representational State Transfer.
You can download the codeignitor from here - https://codeigniter.com/download
Create Database and Table(s)
I will now create a simple database with a table named User. In order to create the database, go to the Application Management tab and launch the database manager.
Type in the following command in the SQL command field:
- CREATE TABLE `tbl_user` (
- `user_id` int(11) NOT NULL,
- `user_name` varchar(40) NOT NULL,
- `user_password` varchar(40) NOT NULL,
- `user_type` varchar(15) NOT NULL
- ) ENGINE=InnoDB DEFAULT CHARSET=utf8;
Setting up Libraries and Permissions
First of all, download codeigniter-restserver and codeigniter-restclient libraries. Extract the contents and then drag and drop application/libraries/Format.php and application/libraries/REST_Controller.php files into the application’s directories.Remember to add require_once it at the top of the controllers in order to load them into the scope. Additionally, copy rest.php file from application/config in application’s configuration directory.
You might be interested in: How To Pass Data From Controller To View In CodeIgniter
Now create a file in the application’s root folder and name it. Paste the following code in it.
Setup Authentication and API Key
First of all, download codeigniter-restserver and codeigniter-restclient libraries. Extract the contents and then drag and drop application/libraries/Format.php and application/libraries/REST_Controller.php files into the application’s directories.Remember to add require_once it at the top of the controllers in order to load them into the scope. Additionally, copy rest.php file from application/config in application’s configuration directory.
You might be interested in: How To Pass Data From Controller To View In CodeIgniter
Now create a file in the application’s root folder and name it .htaccess. Paste the following code in it.
- RewriteEngine On
- RewriteCond %{REQUEST_FILENAME} !-f
- RewriteCond %{REQUEST_FILENAME} !-d
- RewriteRule ^(.*)$ index.php/$1 [L]
Setup Authentication and API Key
To setup authentication, first create the following tables in the database:
- CREATE TABLE `keys` (
- `id` int(11) NOT NULL,
- `key` varchar(40) NOT NULL,
- `level` int(2) NOT NULL,
- `ignore_limits` tinyint(1) NOT NULL DEFAULT '0',
- `is_private_key` tinyint(1) NOT NULL DEFAULT '0',
- `ip_addresses` text,
- `date_created` int(11) NOT NULL
- ) ENGINE=InnoDB DEFAULT CHARSET=utf8;
- CREATE TABLE `logs` (
- `id` int(11) NOT NULL,
- `uri` varchar(255) NOT NULL,
- `method` varchar(6) NOT NULL,
- `params` text,
- `api_key` varchar(40) NOT NULL,
- `ip_address` varchar(45) NOT NULL,
- `time` int(11) NOT NULL,
- `rtime` float DEFAULT NULL,
- `authorized` varchar(1) NOT NULL,
- `response_code` smallint(3) DEFAULT '0'
- ) ENGINE=InnoDB DEFAULT CHARSET=utf8;
The table Keys will be used for storing the API key, and the Logs table will hold the logs of the request(s) received by the server.
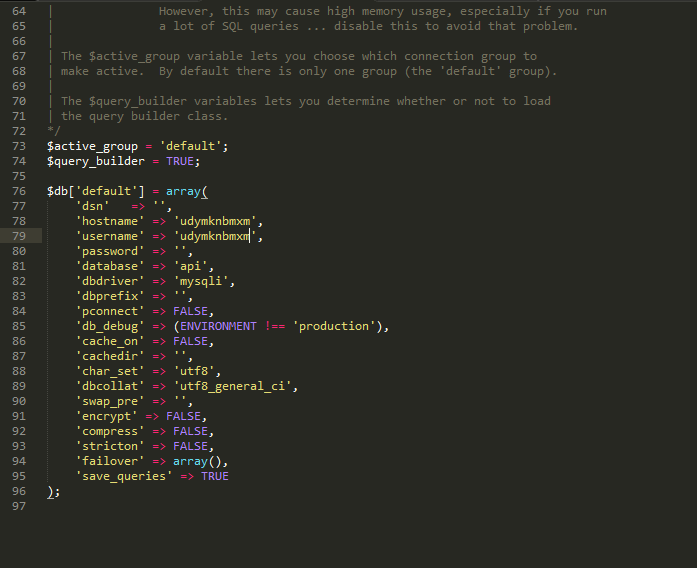
Now open up application / database.php and type in your hostname, dbname and password
The next step is the setup of authentication. For this, open up application / autoload.php and change this line of code
- $autoload['libraries'] = array( );
To this
- $autoload['libraries'] = array('database');
Now go to application / rest.php and set the following entities as shown
- $config['rest_enable_keys'] = TRUE;
- $config['rest_logs_table'] = 'logs';
- $config['rest_auth'] = 'basic';
- $config['auth_source'] = '';
The authentication is now ready. Nest up is the creation of the model and HTTP calls.
Setup HTTP Calls
I will now create two files.
Go to application/controllers and create a new file with the name of api.php. Paste the following code in it.
- <?php
- defined('BASEPATH') OR exit('No direct script access allowed');
- require(APPPATH.'/libraries/REST_Controller.php');
- class Api extends REST_Controller
- {
- public function __construct() {
- parent::__construct();
- $this->load->model('user_model');
- }
- public function user_get(){
- $r = $this->user_model->read();
- $this->response($r);
- }
- public function user_put(){
- $id = $this->uri->segment(3);
- $data = array('name' => $this->input->get('name'),
- 'pass' => $this->input->get('pass'),
- 'type' => $this->input->get('type')
- );
- $r = $this->user_model->update($id,$data);
- $this->response($r);
- }
- public function user_post(){
- $data = array('name' => $this->input->post('name'),
- 'pass' => $this->input->post('pass'),
- 'type' => $this->input->post('type')
- );
- $r = $this->user_model->insert($data);
- $this->response($r);
- }
- public function user_delete(){
- $id = $this->uri->segment(3);
- $r = $this->user_model->delete($id);
- $this->response($r);
- }
- }
Next, go to application/models and paste the following code in it.
- <?php
- defined('BASEPATH') OR exit('No direct script access allowed');
- /**
- *
- */
- class User_model extends CI_Model
- {
- public function read(){
- $query = $this->db->query("select * from `tbl_user`");
- return $query->result_array();
- }
- public function insert($data){
- $this->user_name = $data['name']; // please read the below note
- $this->user_password = $data['pass'];
- $this->user_type = $data['type'];
- if($this->db->insert('tbl_user',$this))
- {
- return 'Data is inserted successfully';
- }
- else
- {
- return "Error has occured";
- }
- }
- public function update($id,$data){
- $this->user_name = $data['name']; // please read the below note
- $this->user_password = $data['pass'];
- $this->user_type = $data['type'];
- $result = $this->db->update('tbl_user',$this,array('user_id' => $id));
- if($result)
- {
- return "Data is updated successfully";
- }
- else
- {
- return "Error has occurred";
- }
- }
- public function delete($id){
- $result = $this->db->query("delete from `tbl_user` where user_id = $id");
- if($result)
- {
- return "Data is deleted successfully";
- }
- else
- {
- return "Error has occurred";
- }
- }
- }
Testing the HTTP Calls
To test the HTTP calls of the API, I will use Postman.Go to the Postman, Set the method to GET , then set the authentication and API key as shown below:


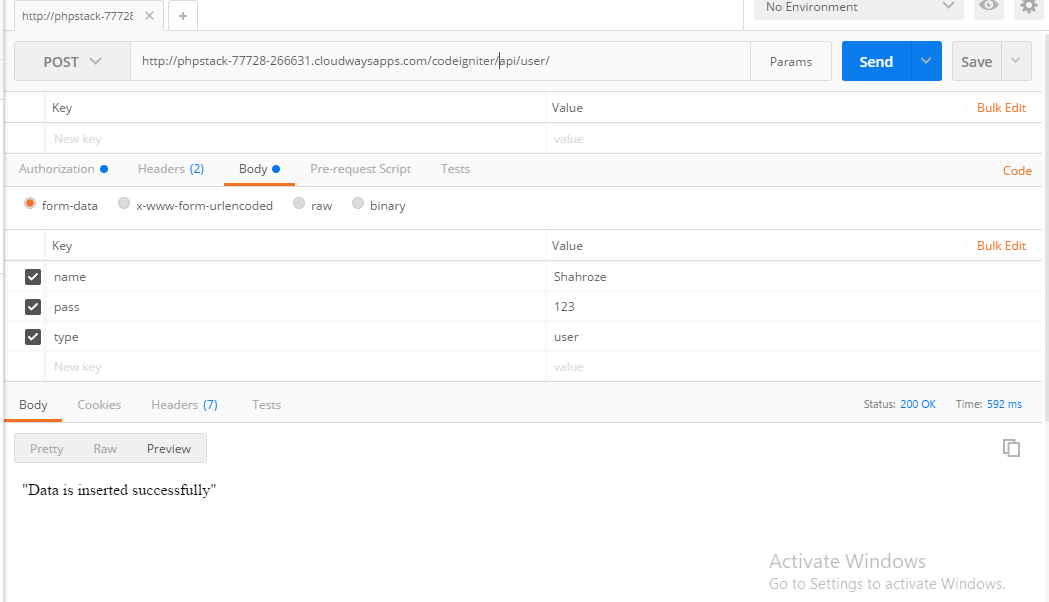
Now to test the POST request, set the request to POST and add the authentication and API key. Fill in the variables as shown below:
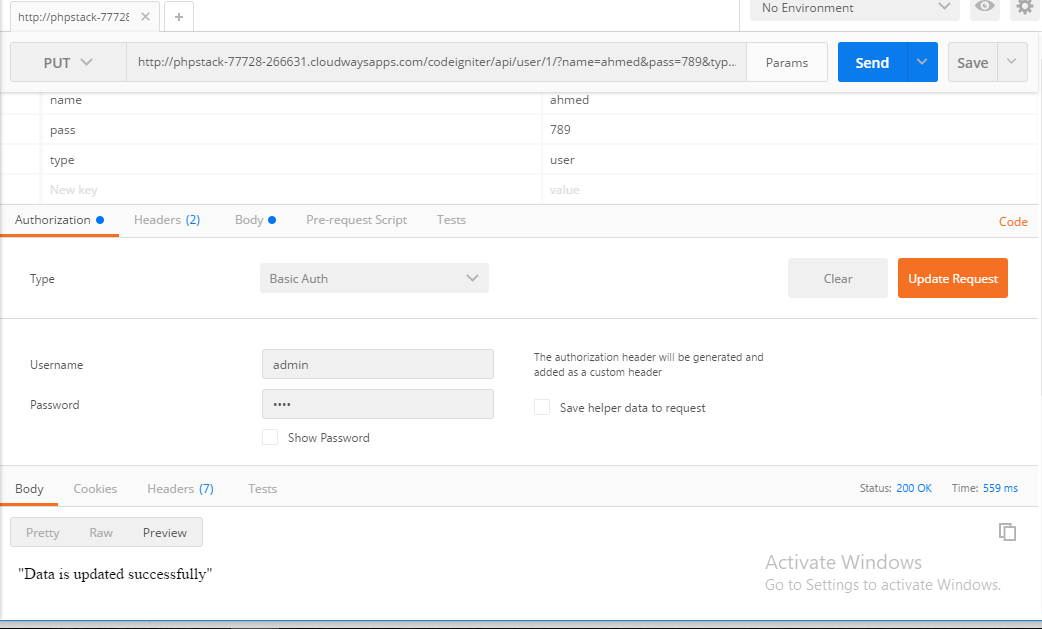
Next, I will test the PUT request. Pass the id in the 3rd segment of the URL, set the request to PUT, set the authentication and the API key and fill in the parameters as shown below:
To test the DELETE request, pass the id in the 3rd segment of the URL, set the request to DELETE, set the authentication and the API key and fill in the parameters as shown below:
To Sum Up
In this tutorial. I described how you could setup authentication for a REST API in Codeigniter. I created four API calls for data manipulation.
If you need any help with the code or the idea of implementing your own RESTful API in Codeigniter, do leave a comment below.
Source - https://www.cloudways.com/blog/rest-api-in-codeigniter/
Please Share this course
TweetIt Looks like you have completed your course!! We have created Online series based on the above content. You can give a test and check your skill.
Be a Part of CollegeSpike by giving your precious comment here and help us in improving our content.
Self-assessment module
